What is ATMEGA328P?
The ATmega328P is a microcontroller chip from the Atmel AVR family, now owned by Microchip Technology. It is widely used in various embedded systems and electronics projects. Here's an overview of the ATmega328P:

Microcontroller Architecture:
The ATmega328P is based on the AVR 8-bit RISC (Reduced Instruction Set Computer) architecture. It features a single-cycle execution, allowing for efficient and fast operation.
Key Features:
-
Clock Speed: The ATmega328P operates at a clock frequency of up to 20 MHz, enabling high-speed processing.
-
Flash Memory: It contains 32KB of in-system programmable flash memory for storing the program code.
-
SRAM: The chip has 2KB of static random-access memory (SRAM) for storing data during program execution.
-
EEPROM: It includes 1KB of electrically erasable programmable read-only memory (EEPROM) for non-volatile data storage.
-
I/O Pins: The ATmega328P offers a total of 23 general-purpose I/O (GPIO) pins, which can be configured as either input or output.
-
Analog-to-Digital Converter (ADC): It has a 10-bit ADC with 6 input channels, allowing the microcontroller to read analog signals.
-
Timers and Counters: The ATmega328P features three 16-bit timers with various modes of operation, as well as a real-time counter (RTC).
-
Serial Communication: It supports multiple serial communication interfaces, including UART (Universal Asynchronous Receiver-Transmitter) and I2C (Inter-Integrated Circuit).
-
Interrupts: The microcontroller offers multiple interrupt sources, allowing it to respond to external events while executing other tasks.
-
Power Management: It includes power-saving features such as sleep modes and various clock options to optimize power consumption.
-
Wide Operating Voltage Range: The ATmega328P can operate within a voltage range of 1.8V to 5.5V, making it compatible with a wide range of power supply options.
Programming and Development Environment:
The ATmega328P can be programmed using the Arduino IDE (Integrated Development Environment), which provides a user-friendly platform for code development and uploading to the microcontroller. It is also possible to program the ATmega328P using other programming languages and tools compatible with the AVR architecture.
Common Applications:
The versatility and widespread availability of the ATmega328P have made it a popular choice for a wide range of applications, including:
-
Electronic Projects: The ATmega328P is commonly used in hobbyist projects, DIY electronics, and prototyping due to its ease of use and compatibility with the Arduino ecosystem.
-
Automation and Control Systems: It finds application in home automation, industrial automation, robotics, and control systems, enabling processing and interfacing with various sensors and actuators.
-
Data Logging and Measurement Devices: With its built-in ADC and ample I/O pins, the ATmega328P is capable of capturing and processing analog signals, making it suitable for data logging, measurement, and sensor-based applications.
-
Wearable Technology: The low power consumption and small form factor of the ATmega328P make it suitable for wearable devices and portable gadgets.
-
Education: The ATmega328P is often used in educational settings to introduce students to microcontrollers and embedded systems due to its simplicity and widespread community support.
The ATmega328P's combination of features, performance, and availability has made it a popular choice among hobbyists, makers, and professionals, contributing to its widespread use in various electronic projects and applications.
ATMEGA328P Pinout
The ATmega328P has a total of 28 pins, each serving a specific purpose. Here's an overview of the pinout for the ATmega328P:
Let's go through some key pins:
-
RESET (1): This pin is used to reset the microcontroller when a low-level signal is applied. It is often connected to a reset button or an external reset circuit.
-
Digital Input/Output (I/O) Pins (2-13, 23-28): These pins can be configured as either input or output and can be used for various purposes such as connecting sensors, driving outputs, or receiving digital signals.
-
VCC (7) and GND (8, 22): VCC is the supply voltage pin that provides power to the microcontroller, usually connected to a +5V power source. GND is the ground pin for the reference voltage.
-
XTAL1 and XTAL2 (10, 9): These pins are used to connect an external crystal oscillator or ceramic resonator to provide the clock signal for the microcontroller.
-
Analog Input Pins (23-28): These pins, labeled as PC0 to PC5, can be used for analog inputs. The ATmega328P has a built-in Analog-to-Digital Converter (ADC) that can convert these analog signals to digital values.
-
AVCC (20) and AREF (21): AVCC is the supply voltage pin for the ADC reference voltage, usually connected to the VCC pin. AREF is an optional external reference voltage pin used for precise ADC conversions.

Please note that the pin functions can vary depending on the configuration and programming of the microcontroller. It is important to consult the ATmega328P datasheet and appropriate documentation for detailed information on each pin's functionality and recommended usage.
Feature & Specifications
Certainly! Here are some key features and specifications of the ATmega328P microcontroller:
Features:
-
High-Performance CPU: The ATmega328P features an 8-bit AVR RISC (Reduced Instruction Set Computer) CPU. It offers high-performance computing capabilities with a wide range of instructions and a pipeline architecture for efficient execution.
-
Memory: It has 32KB of Flash memory for program storage, which is non-volatile and retains data even when power is removed. Additionally, it has 2KB of SRAM (Static Random-Access Memory) for runtime data storage and 1KB of EEPROM (Electrically Erasable Programmable Read-Only Memory) for non-volatile data storage.
-
Peripherals and I/O: The microcontroller includes a variety of peripherals, such as timers/counters, USART (Universal Synchronous/Asynchronous Receiver/Transmitter), SPI (Serial Peripheral Interface), I2C (Inter-Integrated Circuit) interface, and GPIO (General Purpose Input/Output) ports.
-
Analog-to-Digital Converter (ADC): The ATmega328P has a 10-bit ADC with up to 8 analog input channels. This allows it to convert analog signals into digital values for processing.
-
Real-Time Clock (RTC): It includes a 16-bit Timer/Counter with a built-in Real-Time Clock (RTC) that can be used for timekeeping and time-related applications.
-
Low Power Consumption: The microcontroller offers power-saving features, including sleep modes, power-down mode, and advanced power management techniques, making it suitable for battery-powered and low-power applications.
Specifications:
-
Operating Voltage: The ATmega328P operates in the voltage range of 1.8V to 5.5V, enabling it to work with both low-voltage and standard-voltage systems.
-
Clock Speed: It can operate at a maximum clock speed of 20MHz, allowing for fast execution of instructions and efficient processing of data.
-
Digital I/O Pins: The microcontroller offers a total of 23 digital I/O pins, which can be individually configured as inputs or outputs.
-
Package Options: The ATmega328P is available in different package options, including a 28-pin DIP (Dual Inline Package) and surface-mount packages such as QFN, QFP, and MLF.
-
Operating Temperature Range: It can operate within a temperature range of -40°C to +85°C, making it suitable for a wide range of environmental conditions.
-
Communication Interfaces: The microcontroller supports various communication interfaces, including serial UART (Universal Asynchronous Receiver Transmitter) for asynchronous serial communication, SPI for synchronous serial communication, and I2C for interfacing with compatible devices.
-
Instruction Set: The ATmega328P uses an 8-bit AVR instruction set, offering a wide range of instructions for efficient programming and execution.
These are some of the notable features and specifications of the ATmega328P microcontroller. It is a versatile and widely used microcontroller suitable for a broad range of embedded systems and electronic applications. For more detailed information, it is recommended to refer to the official datasheet and documentation provided by the manufacturer, Microchip Technology.

ATmega328p-based Microcontroller Boards
The ATmega328P microcontroller is widely used and has been incorporated into various microcontroller boards. Here are a few popular ATmega328P-based microcontroller boards:
-
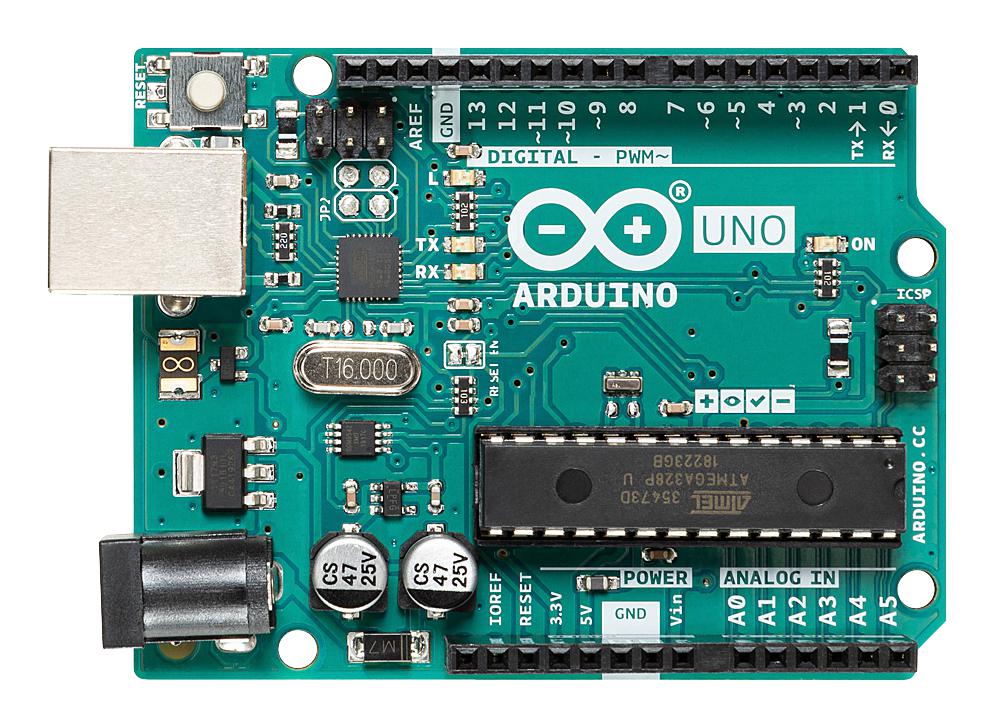
Arduino Uno: Arduino Uno is one of the most well-known and widely used microcontroller boards. It is based on the ATmega328P and offers a beginner-friendly platform for electronics prototyping and projects. The board includes various I/O pins, USB connectivity, and an integrated development environment (IDE) that simplifies programming.
-
Arduino Nano: The Arduino Nano is a compact version of the Arduino platform, based on the ATmega328P. It is smaller in size and offers similar functionality to the Arduino Uno, making it suitable for space-constrained projects. The Nano comes in different variants, including the classic Nano and Nano Every.
-
Arduino Pro Mini: The Arduino Pro Mini is a minimalistic version of the Arduino board, designed for advanced users and projects requiring a compact form factor. It is based on the ATmega328P and lacks some components like USB connectivity. The Pro Mini allows for direct soldering onto a PCB and runs on an external power source.
-
Adafruit Pro Trinket: The Adafruit Pro Trinket is a small, low-cost microcontroller board based on the ATmega328P. It is designed to be compact and suitable for wearables and small projects. The Pro Trinket offers a subset of pins and features compared to the Arduino Uno.
-
SparkFun RedBoard: The SparkFun RedBoard is an Arduino-compatible board based on the ATmega328P. It provides a similar form factor and pinout as the Arduino Uno, making it compatible with a wide range of Arduino shields and libraries. The RedBoard offers easy connectivity and programming options.
-
Adafruit Metro: The Adafruit Metro is a robust, full-featured microcontroller board based on the ATmega328P. It provides an enhanced set of features and capabilities compared to the Arduino Uno. The Metro board is compatible with Arduino software and shields while offering additional functionalities.
-
Seeduino v3: Seeduino v3 is an Arduino-compatible board based on the ATmega328P. It features a compact design and supports a wide range of projects. The Seeduino v3 board includes multiple I/O pins, USB connectivity, and an onboard micro USB socket for convenient programming and power supply.
These are just a few examples of ATmega328P-based microcontroller boards available in the market. Each board offers its own set of features, form factors, and additional functionalities to cater to specific project requirements. It's important to compare the specifications and features to choose the board that best suits your project needs.
ATMEGA328P Block Diagram
Below is a simplified block diagram representing the key components and functional blocks of the ATmega328P microcontroller:
Here's a brief explanation of each major component:
-
Central Processing Unit (CPU): This is the main processing unit responsible for executing instructions and coordinating the various operations of the microcontroller.
-
Memory Unit: The memory unit consists of three types of memory:
- Flash Program Memory: This non-volatile memory stores the program code that controls the microcontroller's behavior.
- SRAM (Data Memory): This volatile memory provides temporary storage for variables, registers, and stack.
- EEPROM Data Memory: This non-volatile memory stores data that persists even when power is removed, typically used for storing configuration or calibration data.
-
I/O Ports & Peripherals: This block includes the General Purpose Input/Output (GPIO) pins, which allow the microcontroller to communicate with the external world. It also encompasses various peripherals such as timers/counters for precise timing, serial interfaces (SPI, I2C, USART) for communication, and the Analog-to-Digital Converter (ADC) for converting analog signals into digital values.
-
Oscillator & Clock Control: This block manages the system clock and timing. It includes an internal oscillator and the ability to accept an external clock input. The PLL (Phase-Locked Loop) allows the microcontroller to scale and derive different clock frequencies for specific timing requirements.
These functional units work together to enable the ATmega328P microcontroller to execute programs, interact with the environment through I/O ports, keep track of time, and handle various communication protocols.
Please note that this diagram is a simplified representation for illustrative purposes, and the actual microcontroller may have additional components and connections. For a more detailed understanding of the ATmega328P's architecture and functionality, it is recommended to refer to the official datasheet and documentation provided by the manufacturer, Microchip Technology.
Where to Use ATMEGA328P
The ATmega328P microcontroller is a versatile and widely used microcontroller that can be employed in various applications. Here are some common areas where the ATmega328P is utilized:
-
Embedded Systems: The ATmega328P is extensively used in embedded systems, which are dedicated computer systems designed for specific tasks. It can be employed in home automation, industrial control, robotics, smart devices, and similar applications.
-
IoT (Internet of Things): With its low power consumption, GPIO capabilities, and support for various communication protocols, the ATmega328P is suitable for IoT projects. It can be used in sensor nodes, data acquisition systems, environmental monitoring devices, and other IoT applications.
-
DIY Electronics and Hobbyist Projects: The ATmega328P, often in the form of Arduino boards, is a beloved choice for hobbyists and electronics enthusiasts. Its ease of use, extensive community support, and flexibility make it ideal for creating interactive projects, prototyping, and experimenting.
-
Educational Purposes: The ATmega328P is an excellent microcontroller for learning electronics and programming. Its widespread adoption and availability of learning resources, tutorials, and project examples make it a popular choice in educational settings to teach the concepts of microcontrollers and embedded systems.
-
Automation and Control Systems: The ATmega328P can be used in automation and control systems to monitor and control various devices and processes. It is employed in projects like home automation, smart agriculture, industrial automation, and building management systems.
-
Wearable Devices: Due to its compact size and low power consumption, the ATmega328P can be used in wearable devices such as fitness trackers, smartwatches, and health monitoring devices.
-
Prototyping and Proof-of-Concepts: The ATmega328P is commonly used in the early stages of product development for prototyping and proof-of-concept purposes. Its affordability, easy integration with sensors and peripherals, and extensive software libraries enable rapid development and evaluation of ideas.
These are just a few examples of the broad range of applications where the ATmega328P can be utilized. Its popularity and widespread usage have resulted in an active community, extensive documentation, and an abundance of code examples and libraries, making it a reliable choice for a wide range of projects and applications.
How to Use ATMEGA328P
To use the ATmega328P microcontroller, you will typically follow these steps:
-
Hardware Setup:
- Connect the necessary components to the ATmega328P microcontroller based on your project requirements. This may include connecting power supply, crystal oscillator, capacitors, reset circuitry, pull-up resistors, LEDs, buttons, sensors, and other peripherals.
- Refer to the datasheet and hardware documentation to ensure proper pin connections and configuration for each component.
-
Programming the Microcontroller:
- Write or obtain the program code (firmware) for your desired functionality. The code is typically written in a programming language such as C or C++ and uses development tools like the Arduino IDE, Atmel Studio, or other supported development environments.
- Connect the ATmega328P microcontroller to your computer using a suitable programming tool such as an ISP (In-System Programmer), JTAG debugger, or USB-to-serial converter.
- Select the appropriate programming tool and configuration in your development environment, and upload the compiled firmware to the ATmega328P microcontroller.
-
Powering the Microcontroller:
- Apply the proper power supply voltage (typically between 1.8V and 5.5V) to the microcontroller to ensure it operates within its specified voltage range.
- Connect the power supply to the appropriate pins of the microcontroller (VCC and GND) based on the hardware configuration.
-
Testing and Debugging:
- Once the firmware is uploaded and the microcontroller is powered, test your project for the desired functionality.
- Use debugging techniques, such as UART or debugging tools, to verify the execution of your code, monitor variables, and troubleshoot any issues.
-
Iterative Development:
- As you develop your project, you may need to fine-tune your code, modify hardware connections, or expand the functionality of your application. Repeat the steps of programming, testing, and debugging as needed.
It is essential to refer to the ATmega328P datasheet, accompanying documentation, and relevant development tools and libraries specific to the microcontroller to ensure correct usage and efficient development. Additionally, community resources, tutorials, and forums available online can provide valuable guidance and support during the programming and troubleshooting process.
How to Use ATMega328P using Arduino IDE
To use the ATmega328P microcontroller with the Arduino IDE, follow these steps:
-
Install Arduino IDE:
- Download and install the Arduino IDE from the official Arduino website (https://www.arduino.cc/en/software).
- Follow the installation instructions specific to your operating system.
-
Prepare ATmega328P Hardware:
- If you are using an Arduino board that incorporates ATmega328P (e.g., Arduino Uno), you can skip this step. The microcontroller is already present on the board.
- If you are using a standalone ATmega328P chip, you need to connect it to your development setup. This involves connecting power, crystal oscillator, capacitors, reset circuitry, and other components as necessary. Refer to the Arduino documentation or relevant tutorials for guidance on connections.
-
Select the Board:
- Launch the Arduino IDE.
- Click on "Tools" in the menu bar and navigate to the "Board" submenu.
- Select the appropriate board that uses ATmega328P. For example, if you are using Arduino Uno, select "Arduino Uno." If you are using a custom setup with ATmega328P, choose the corresponding board that matches your configuration.
-
Select the Serial Port:
- In the same "Tools" menu, navigate to the "Port" submenu.
- Select the COM port that corresponds to your Arduino board or ATmega328P setup. If you are unsure, you can check the port before and after connecting your device to see which new port appears.
-
Write and Upload the Sketch:
- Start writing your program (sketch) in the Arduino IDE. Use the familiar Arduino programming language, which is based on C/C++.
- Write your code to define the required functionality using the Arduino functions and libraries.
- Click the "Upload" button (right-pointing arrow) in the Arduino IDE toolbar to compile and upload your sketch to the ATmega328P microcontroller.
- The IDE will compile your code and upload it to the selected board or ATmega328P chip. You can monitor the progress in the bottom panel of the IDE.
-
Testing and Debugging:
- After uploading, the program will start running on the ATmega328P microcontroller.
- Use the built-in debug tools of the Arduino IDE, such as the Serial Monitor, to output debug information and monitor the behavior of your program.
By following these steps, you can effectively use the ATmega328P microcontroller with the Arduino IDE, allowing you to leverage the vast Arduino ecosystem, libraries, and community support for your projects.

Advantages & Disadvantages of ATmega328P and Arduino Uno
Advantages of ATmega328P:
-
Versatility: The ATmega328P is a versatile microcontroller that can be used in a wide range of applications. It offers a good balance of digital and analog I/O pins, EEPROM memory, timers, and serial communication interfaces, making it suitable for various projects.
-
Familiarity: The ATmega328P is widely used and has a large community of developers. It is supported by numerous libraries, examples, and resources, making it easier to find solutions, troubleshoot issues, and accelerate development.
-
Low Power Consumption: The ATmega328P is designed to operate at low power, making it suitable for battery-powered applications or projects that prioritize energy efficiency.
-
Cost-Effective: The ATmega328P is an affordable microcontroller, making it accessible for hobbyists, students, and budget-conscious projects.
-
Arduino Compatibility: The ATmega328P is the heart of the popular Arduino Uno board, which means it is fully compatible with the Arduino ecosystem. This compatibility allows you to leverage the vast collection of Arduino libraries, shields, and community support.
Disadvantages of ATmega328P:
-
Limited Memory: The ATmega328P has limited program memory (32KB) and RAM (2KB), which can be a constraint for complex applications requiring extensive code or data storage.
-
Limited Processing Power: The ATmega328P operates at a clock frequency of up to 16MHz and has a relatively modest processing power. This can limit its performance for computationally intensive tasks or real-time applications with strict timing requirements.
-
Limited I/O Pins: The ATmega328P has a limited number of digital and analog I/O pins (14 digital and 6 analog on Arduino Uno). Projects requiring a large number of I/O connections may face constraints.
Advantages of Arduino Uno:
-
Ease of Use: Arduino Uno provides a beginner-friendly platform for learning and prototyping. It has a simple development environment, clear documentation, and a large community of users, making it accessible for those new to microcontrollers and programming.
-
Extensive Library and Ecosystem: Arduino Uno benefits from a vast collection of pre-written libraries and shields, simplifying the development process and enabling rapid prototyping. The ecosystem also includes various hardware add-ons that extend the Uno's capabilities.
-
Abundance of Learning Resources: Due to its popularity, Arduino Uno has numerous tutorials, guides, and example projects available online. This wealth of resources makes it easier to learn and troubleshoot.
-
Cross-Platform Compatibility: The Arduino IDE is available for multiple operating systems (Windows, Mac, Linux), enabling users to develop and program Arduino Uno on their preferred platform.
Disadvantages of Arduino Uno:
-
Limited Processing Power: Arduino Uno utilizes the ATmega328P, which has limited processing power compared to more advanced microcontrollers. This limitation may restrict complex computations and real-time applications.
-
Limited Memory: Arduino Uno has limited program memory (32KB) and RAM (2KB), which can be a constraint for larger projects or programs with extensive code or data storage requirements.
-
Size and Form Factor: Arduino Uno has a relatively larger physical size compared to smaller microcontroller boards. In projects where space is a concern, the size of the Uno may be restrictive.
-
Lack of Native Connectivity: Arduino Uno lacks built-in Ethernet or Wi-Fi connectivity options. While it can be overcome using additional shields or modules, it adds cost and complexity to projects requiring network connectivity.
It's important to consider these advantages and disadvantages when choosing between ATmega328P and Arduino Uno for a specific project. The decision ultimately depends on the project's requirements, complexity, processing power needs, cost considerations, available resources, and the familiarity of the development team with the Arduino ecosystem.
ATMEGA328P Replacements & Alternatives
The ATmega328P microcontroller is widely used, but there are a few alternatives and replacements available that offer similar or enhanced features. Here are some notable options:
-
ATmega328PB: The ATmega328PB is an upgraded version of the ATmega328P. It retains the same pinout and features as the ATmega328P while introducing additional functionalities. The ATmega328PB offers more I/O pins, additional USART and SPI interfaces, and enhanced analog capabilities compared to its predecessor.
-
ATmega328P-AU with Optiboot: Optiboot is an optimized bootloader for the ATmega328P microcontroller. It allows faster upload speeds and increases the available program memory by minimizing the bootloader size. By simply updating the bootloader, you can enhance the performance and functionality of the ATmega328P-based boards.
-
ATmega32U4: The ATmega32U4 is another microcontroller from Atmel (now Microchip) that offers enhanced capabilities compared to the ATmega328P. It features built-in USB functionality and additional digital and analog I/O pins. The ATmega32U4 is commonly used in Arduino Leonardo boards and is ideal for applications requiring USB connectivity and advanced features.
-
ESP8266: The ESP8266 is a Wi-Fi-enabled microcontroller module that has gained popularity in IoT projects. It combines a microcontroller with built-in Wi-Fi connectivity, allowing easy integration into Wi-Fi-enabled applications. Although it does not have the same I/O capabilities as the ATmega328P, it offers the advantage of wireless networking features.
-
ESP32: The ESP32 is a more powerful successor to the ESP8266. It integrates a dual-core processor, Wi-Fi, and Bluetooth capabilities, making it suitable for a wide range of IoT applications. The ESP32 provides more processing power, I/O pins, and hardware peripherals compared to the ATmega328P.
-
STM32: The STM32 family of microcontrollers from STMicroelectronics offers a wide range of ARM-based alternatives to the ATmega328P. These microcontrollers provide higher processing power, more memory, and advanced peripherals. The STM32 boards come in various form factors and are commonly used in professional and industrial applications.
-
PIC18F Series: The PIC18F series microcontrollers from Microchip are another alternative to the ATmega328P. They offer a broad range of features, including multiple I/O pins, analog-to-digital converters (ADCs), timers, and communication interfaces. The PIC18F microcontrollers are suitable for various applications and are widely used in industrial and embedded systems.
These are just a few alternatives and replacements to the ATmega328P. Each option offers specific features and capabilities, so it's crucial to consider the requirements of your project when selecting a suitable microcontroller. Factors such as processing power, I/O capabilities, memory capacity, and ecosystem support should be taken into account for making an informed decision.
ATMEGA328P Applications
The ATmega328P microcontroller is versatile and can be used in various applications. Here are some common applications where the ATmega328P is commonly utilized:
-
DIY Electronics and Hobbyist Projects: The ATmega328P is widely popular in the DIY and maker community. It is used in Arduino boards and is ideal for creating interactive projects, prototyping, and experimenting with electronics.
-
Home Automation and IoT Devices: The ATmega328P can be employed in home automation systems, allowing control and monitoring of lights, appliances, security systems, and other devices. It is also used in IoT projects for sensor data acquisition, data communication, and integration with cloud platforms.
-
Robotics: The ATmega328P is suitable for controlling various aspects of robotics projects, such as motor control, sensor integration, and communication with peripherals. It is commonly used in robot kits, autonomous vehicles, and robotic arms.
-
Industrial Control Systems: The ATmega328P finds applications in industrial control systems, including process control, monitoring, and automation. It can be used for controlling machinery, sensors, actuators, and other components in manufacturing environments.
-
Educational Projects: The ATmega328P is a popular choice in educational settings for teaching microcontroller programming and electronics. It is widely used in STEM education to introduce students to embedded systems and coding.
-
Gaming and Entertainment: The ATmega328P can be used in gaming devices and entertainment systems. It can control buttons, switches, and displays, enabling the development of simple games, handheld consoles, and interactive installations.
-
Embedded Systems: The ATmega328P can be utilized in various embedded systems, such as digital thermostats, energy management systems, data loggers, and control panels. It offers sufficient I/O pins, timers, and communication interfaces to support a wide range of applications.
-
Environmental Monitoring: The ATmega328P is employed in environmental monitoring systems for measuring and analyzing parameters like temperature, humidity, air quality, noise levels, and radiation. It can collect sensor data and transmit it to a central system for analysis and visualization.
-
Smart Agriculture: The ATmega328P can be used in agriculture applications for tasks such as monitoring soil moisture, controlling irrigation systems, detecting environmental conditions, and managing greenhouse environments.
-
Prototyping and Proof-of-Concepts: Due to its ease of use and availability, the ATmega328P is often used for rapid prototyping and proof-of-concept development in various fields.
These are a few examples of the applications where the ATmega328P can be employed. Its versatility, cost-effectiveness, and extensive community support make it a popular microcontroller choice for a wide range of projects in different domains.
ATMEGA328P Package
The ATmega328P microcontroller is available in different package options to suit various applications and manufacturing requirements. The most common packages for the ATmega328P are:
-
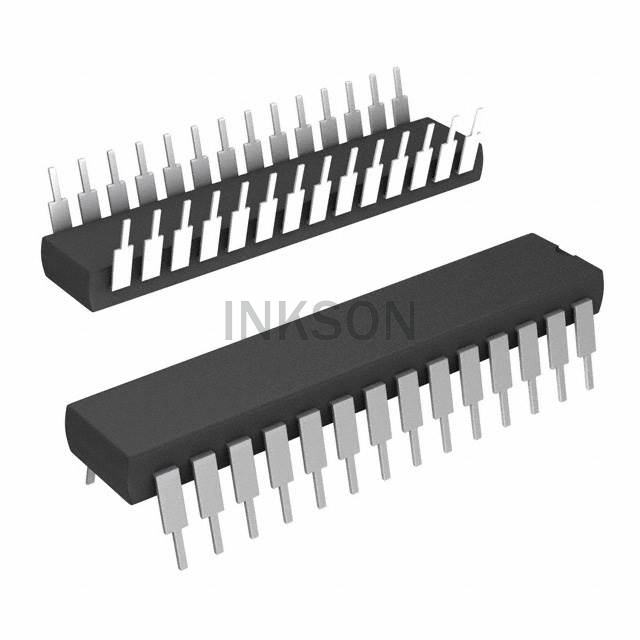
PDIP (Plastic Dual Inline Package): PDIP is a traditional through-hole package with two parallel rows of pins. It is a popular package choice for hobbyist projects and prototyping due to its ease of use and compatibility with standard breadboards and development boards.
-
TQFP (Thin Quad Flat Package): TQFP is a surface-mount package with leads extending from all four sides of the IC. It is commonly used in production and compact designs where smaller PCB footprint and higher pin density are required. TQFP packages with 32, 44, or 48 pins are often utilized for the ATmega328P.
-
QFN (Quad Flat No-Lead Package): QFN is a surface-mount package that has no leads extending from the sides. Instead, the connections are made via metal pads on the bottom of the package. QFN packages offer a compact form factor and improved electrical performance due to shorter interconnect lengths. They are suitable for small and space-constrained designs.
-
MLF (Micro Lead Frame): MLF is another surface-mount package type designed for compact and low-profile applications. It offers a small footprint, good thermal performance, and excellent electrical characteristics. MLF packages have a square or rectangular shape and are suitable for space-constrained designs.
It's important to note that the ATmega328P is available in various sub-models, such as ATmega328P-PU (PDIP package), ATmega328P-AU (TQFP package), and ATmega328P-MU (QFN package). The specific sub-model and package availability may vary depending on the manufacturer and distributor.
When selecting the appropriate package for your application, consider the PCB size, assembly method, space constraints, electrical requirements, and manufacturing capabilities.
ATMEGA328P Datasheet
Unfortunately, as an AI text-based model, I don't have direct access to external files or the ability to browse the internet, so I cannot provide the ATmega328P datasheet directly. However, you can easily find the datasheet for the ATmega328P microcontroller by performing a web search using keywords like "ATmega328P datasheet" or by visiting the official website of Microchip Technology, the manufacturer of the ATmega328P.
Microchip Technology provides comprehensive documentation, including datasheets, application notes, and other technical resources, on their website. The ATmega328P datasheet contains detailed information about the microcontroller's electrical characteristics, pinout, memory organization, registers, instruction set, peripherals, and much more. It is a valuable resource for understanding the functionality and programming of the ATmega328P.
Make sure to download the datasheet from a reputable source to ensure you have the most up-to-date and accurate information.
Conclusion
In conclusion, the ATmega328P microcontroller is a versatile and widely used device with various features and specifications. It offers high-performance computing capabilities with its 8-bit AVR RISC CPU and provides sufficient memory for program storage (Flash), data storage (SRAM), and non-volatile data storage (EEPROM). The microcontroller includes several peripherals and I/O options, such as timers/counters, USART, SPI, I2C, and GPIO ports, enabling connectivity and interaction with other devices. It also incorporates an ADC for analog-to-digital conversion and a built-in Real-Time Clock for time-related applications. With its low power consumption and operating voltage range, the ATmega328P is suitable for a wide range of applications, including embedded systems and electronic projects. For detailed information and specific functionalities, referring to the official datasheet and technical documentation from Microchip Technology, the manufacturer, is recommended.